3.2 实战 | Python 实现 AI 语音合成技术
0. 前言
如今,语音识别、语音合成
等技术在各行各业得到广泛应用,各种大厂平台也顺势发展,对各类流行开发语言的支持也十分友好。
今天我将选择 百度云 作为案例演示平台,使用 Python
开发语言实现语音合成的小案例。
1. 语音合成技术
语音合成(speech synthesis)是通过机械的、电子的方法产生人造语音的技术。
TTS技术(又称文语转换技术)隶属于语音合成,它是将计算机自己产生的、或外部输入的文字信息转变为可以听得懂的、流利的汉语口语输出的技术。
简单来说,就是可以将我们的文字信息,转换成音频数据,我们可以以文件的形式保存,为后续的使用提供便利。
2.案例实现
2.1 API 设计
案例的API设计如下:
if __name__ == '__main__':
    app_id = '应用 ID'
    api_key = 'API 开发密钥'
    secret_key = '密钥'
    AipSpeech(app_id, api_key, secret_key).main()
3.实现流程
3.1 准备工作
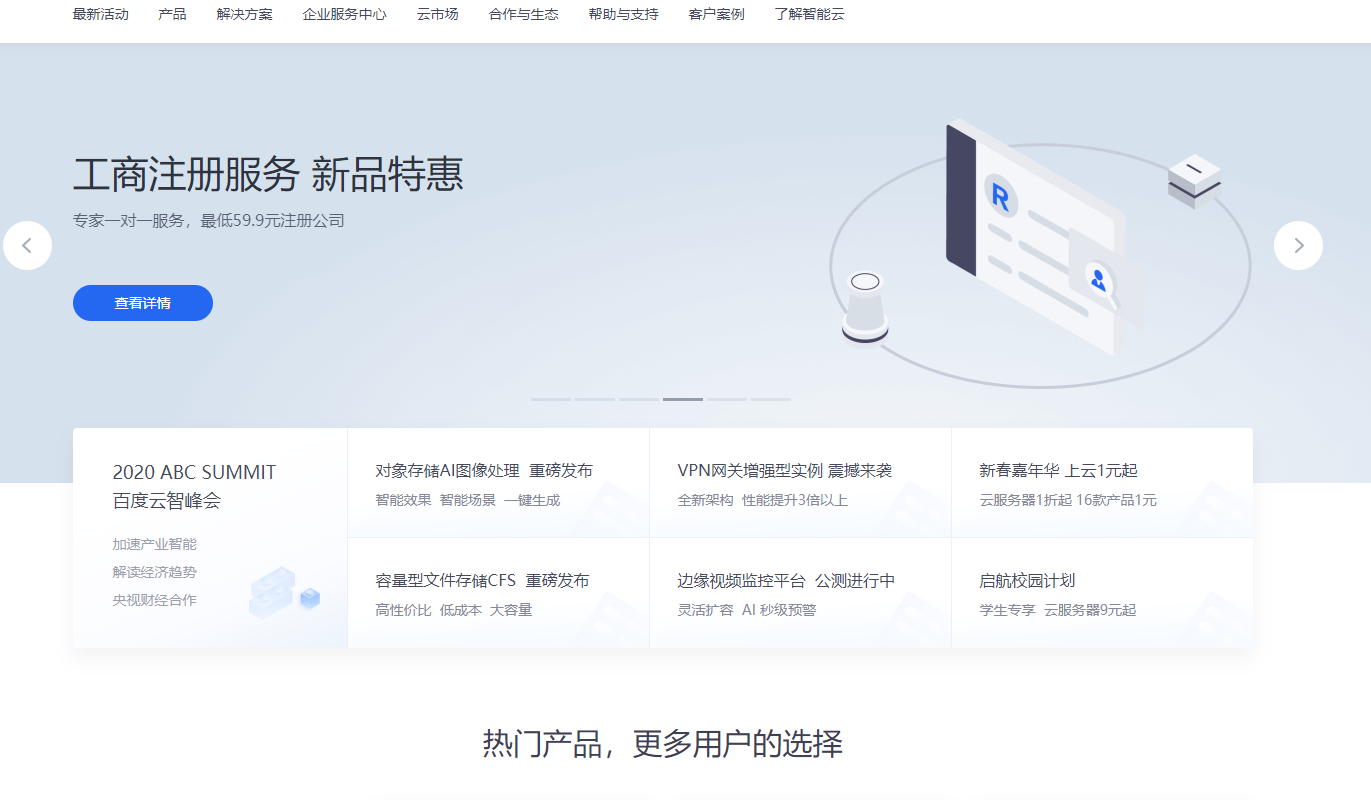
1、进入百度云官网 https://cloud.baidu.com/,并注册、登陆。
1.百度云首页.png
2、进入控制台页面,选择语音技术,并点击 创建应用。
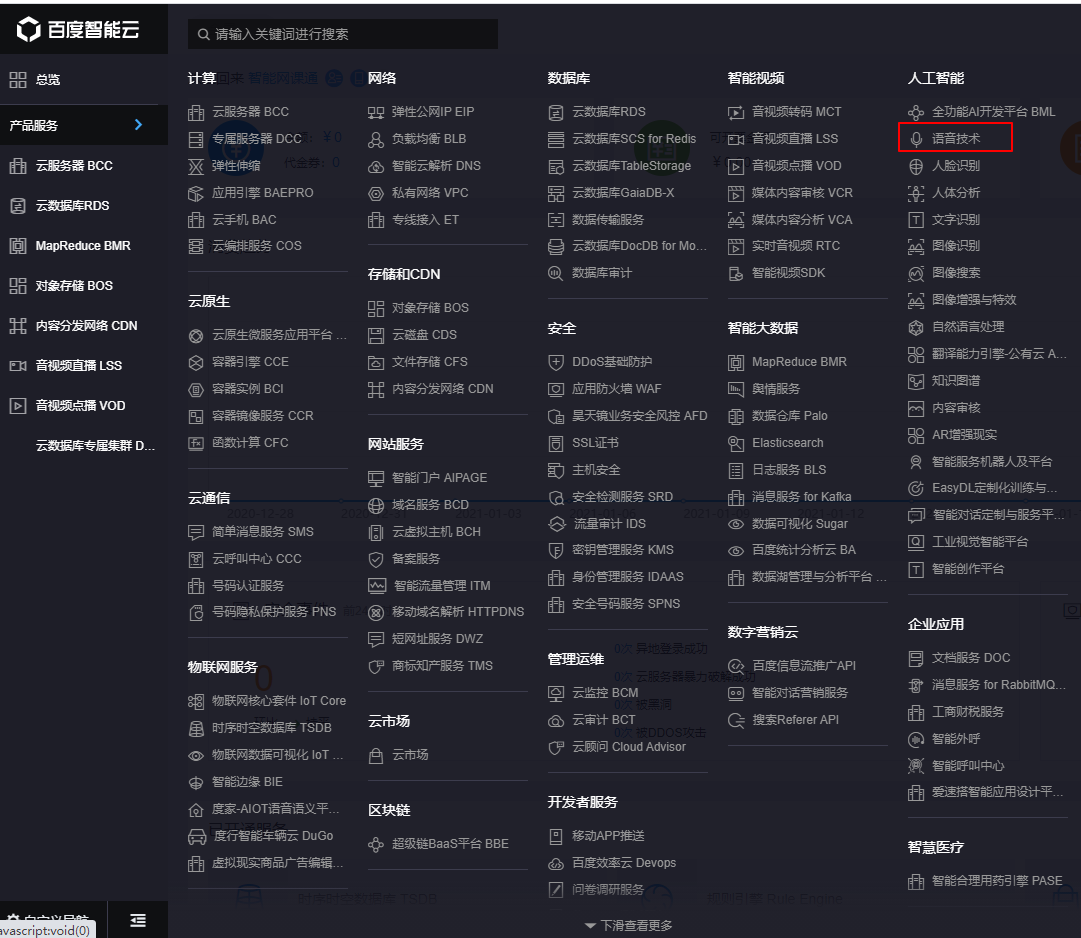
2.语音技术.png
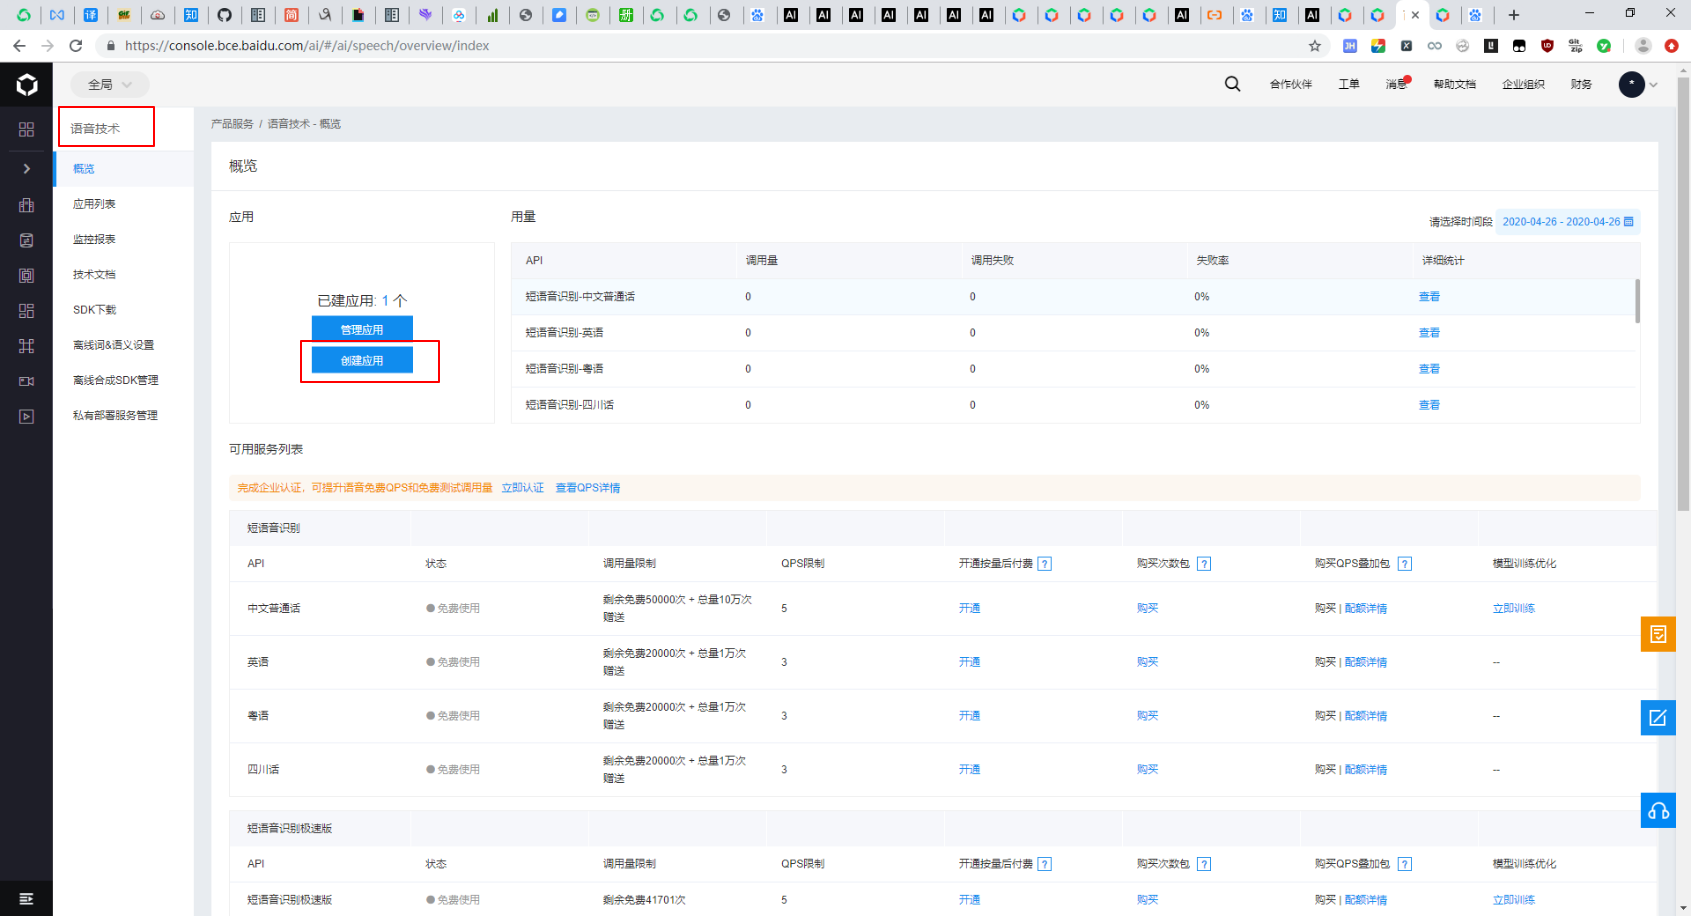
2.1.创建应用.png
3、填写相关信息后点击,立即创建。
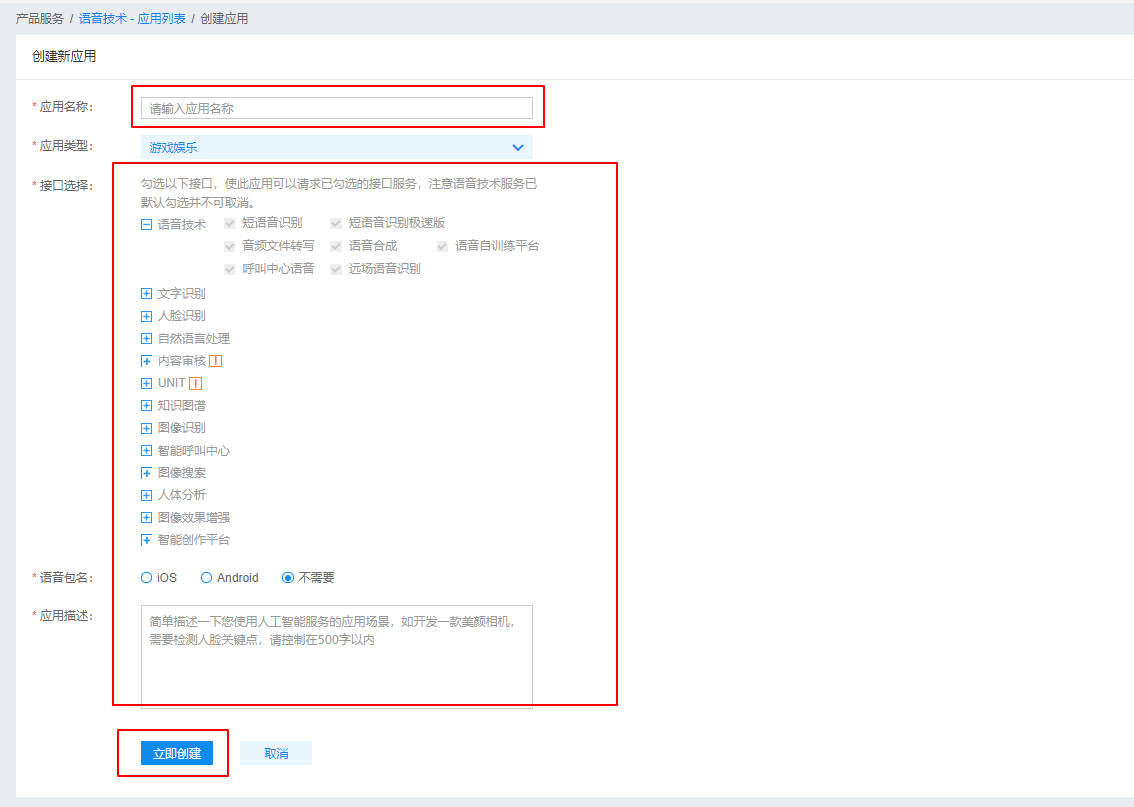
3.描述应用.png
4、创建完毕后,就可管理刚刚创建的应用,查看 应用ID、密钥 等参数。
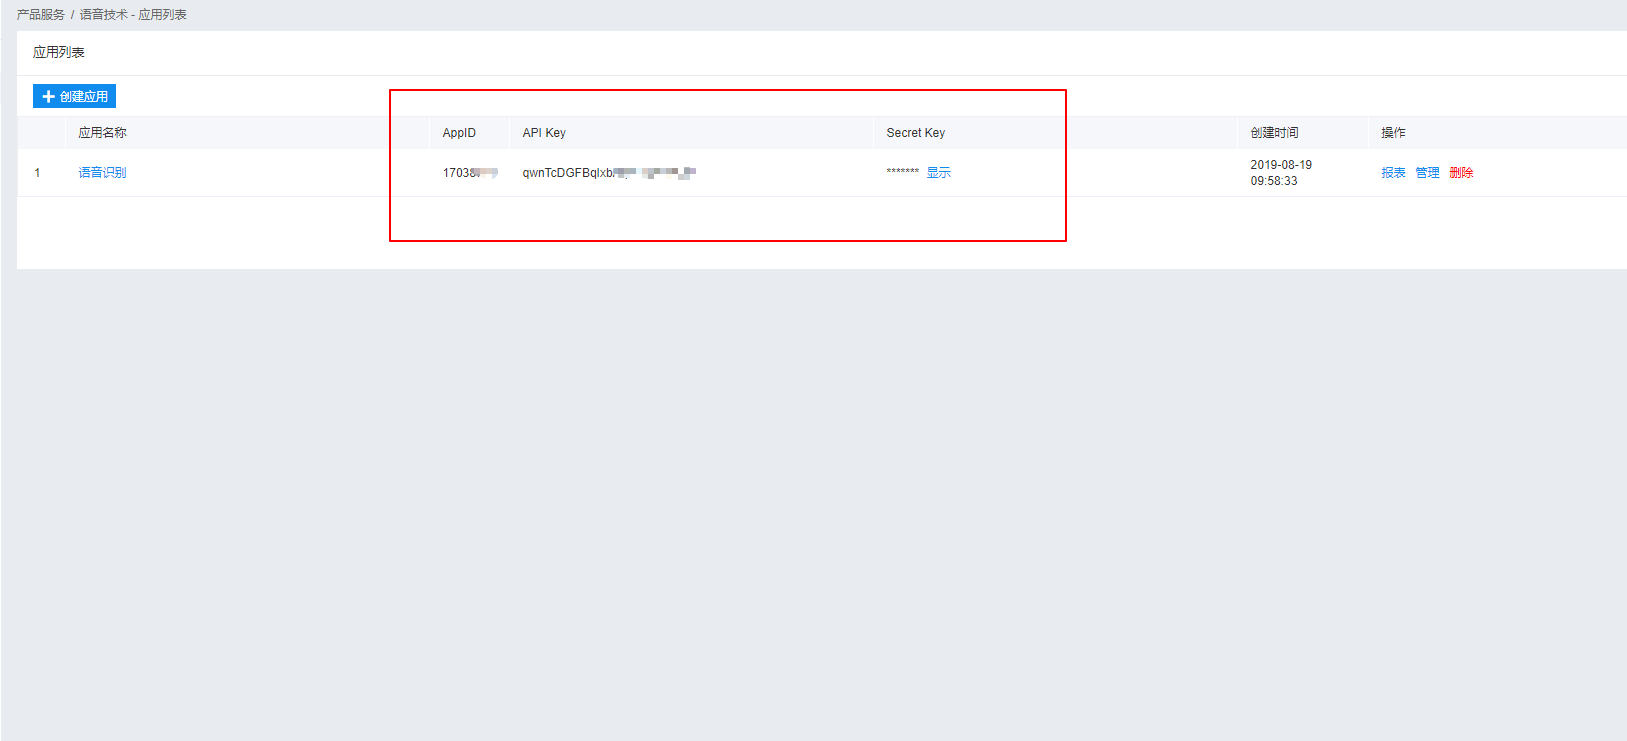
4.管理应用.png
5、进入 SDK 资源网页,下载在线合成 Python-SDK 压缩文件。
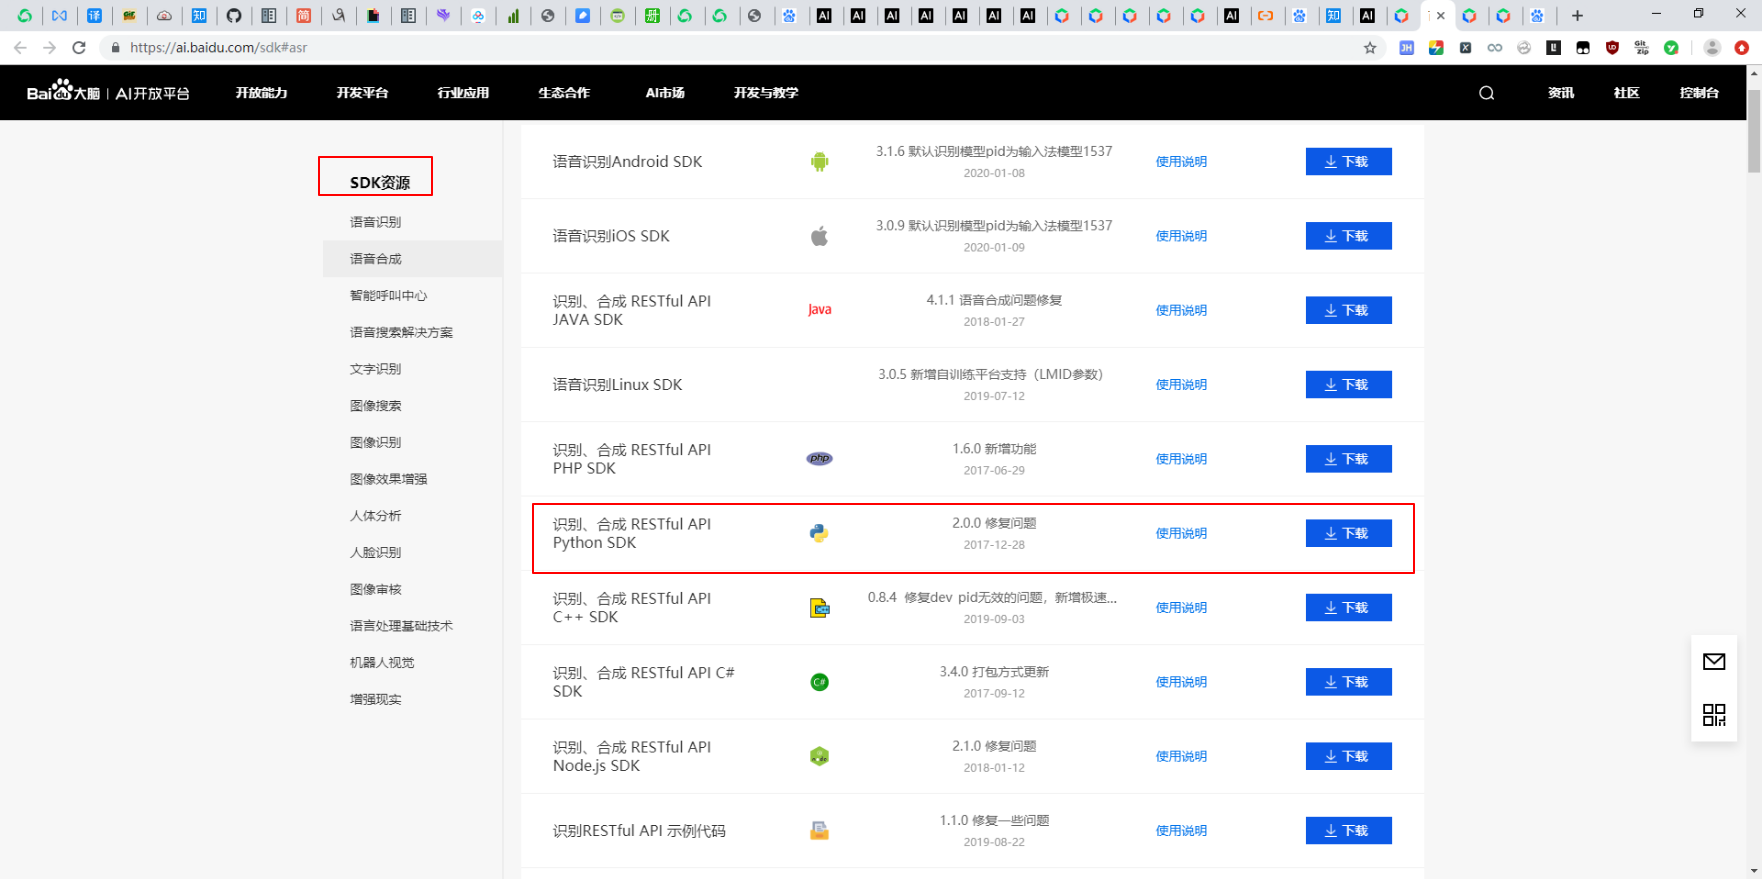
5.SDK.png
6、解压后的 SDK 中的 api 目录结构如下图,具体实现可参考 接口说明 。
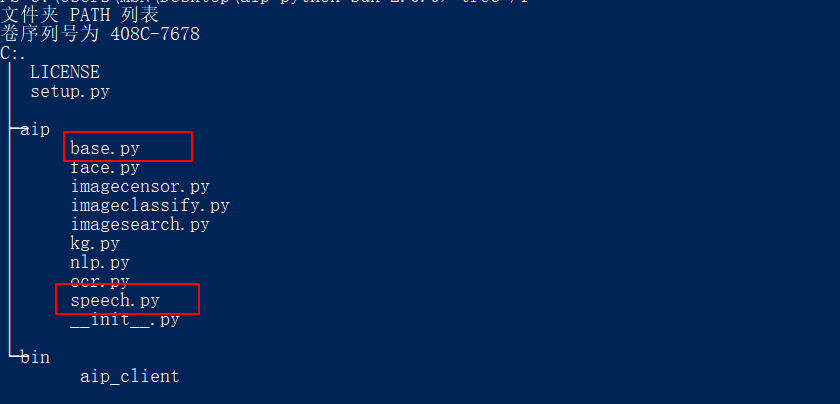
SDK目录.png
6.接口说明.png
3.2 API 封装、改写
为了方便使用,我们可对 SDK 进行封装,改写部分内容。
1、新建 baidu_speech_synthesis.py 文件。
# -*- coding: utf-8 -*-

"""
    Speech_Synthesis
"""

import base64
import hmac
import json
import hashlib
import datetime
import time
import sys
import requests
2、将 base.py 文件中 AipBase 类的相关代码拷贝到刚刚创建的
baidu_speech_synthesis.py 文件中,删除 python2 的相关写法。
# 以上略
class AipBase(object):
    """
        AipBase
    """
    __accessTokenUrl = 'https://aip.baidubce.com/oauth/2.0/token'
    __reportUrl = 'https://aip.baidubce.com/rpc/2.0/feedback/v1/report'
    __scope = 'brain_all_scope'

    def __init__(self, app_id, api_key, secret_key):
        """
            AipBase(app_id, api_key, secret_key)
        """
        self._app_id = app_id.strip()
        self._api_key = api_key.strip()
        self._secret_key = secret_key.strip()
        self._auth_obj = {}
        self._is_cloud_user = None
        self.__client = requests
        self.__connect_timeout = 60.0
        self.__socket_timeout = 60.0
        self._proxies = {}
        self.__version = '2_0_0'

    def get_version(self):
        """
            version
        """
        return self.__version

    def set_connection_timeout_in_millis(self, ms):
        """
            set_connection_timeout_in_millis
            建立连接的超时时间(单位:毫秒)
        """
        self.__connect_timeout = ms / 1000.0

    def set_socket_timeout_in_millis(self, ms):
        """
            set_socket_timeout_in_millis
            通过打开的连接传输数据的超时时间(单位:毫秒)
        """
        self.__socket_timeout = ms / 1000.0

    def set_proxies(self, proxies):
        """
            proxies
        """
        self._proxies = proxies
# 由于代码量大,以下略...
3、将 speech.py 文件中 AipSpeech 类的相关代码拷贝到刚刚创建的
baidu_speech_synthesis.py 文件中。
# 以上略
class AipSpeech(AipBase):
    """
        Aip Speech
    """
    __asrUrl = 'http://vop.baidu.com/server_api'
    __ttsUrl = 'http://tsn.baidu.com/text2audio'

    def _is_permission(self, auth_obj):
        """
            check whether permission
        """
        return True

    def _proccess_request(self, url, params, data, headers):
        """
            参数处理
        """
        token = params.get('access_token', '')
        if not data.get('cuid', ''):
            data['cuid'] = hashlib.md5(token.encode()).hexdigest()
        if url == self.__asrUrl:
            data['token'] = token
            data = json.dumps(data)
        else:
            data['tok'] = token
        if 'access_token' in params:
            del params['access_token']
        return data

    def _proccess_result(self, content):
        """
            formate result
        """
        try:
            return super(AipSpeech, self)._process_result(content)
        except Exception as e:
            return {
                '__json_decode_error': content,
            }
# 由于代码量大,以下略...
4、处理baidu_speech_synthesis.py 文件中 disable_warnings()
的导包问题,改写部分方法,修改部分变量命名。
from urllib3 import disable_warnings
from urllib.parse import urlencode
from urllib.parse import quote
from urllib.parse import urlparse

disable_warnings()
5、接口相关参数配置如下图。
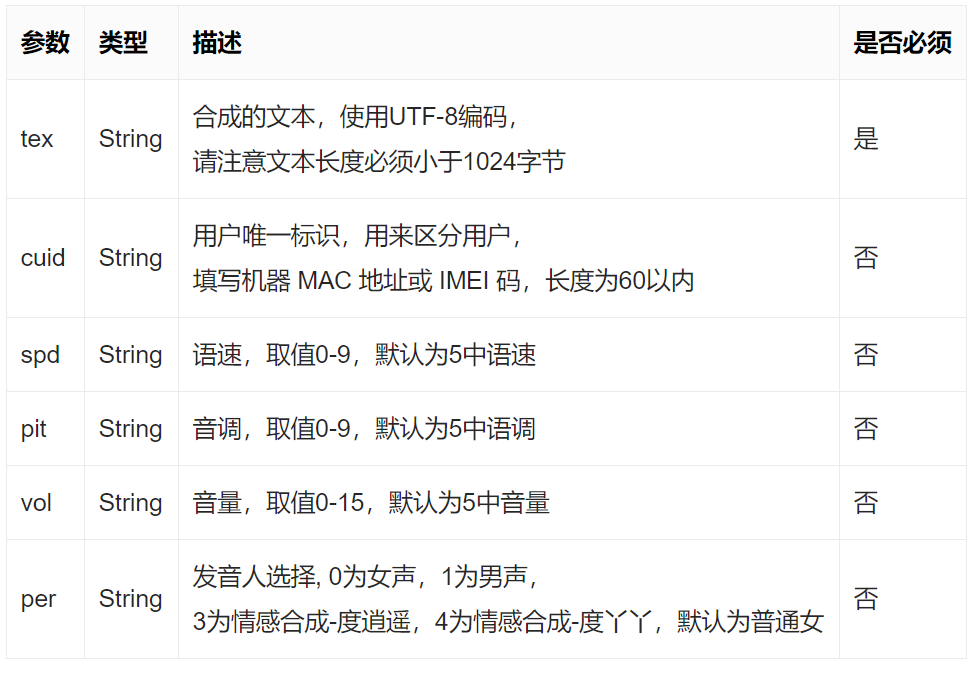
接口参数描述.png
6、在 AipSpeech 中封装 main 入口方法,我配置 per 为 3 ,选择男生情感合成。
class AipSpeech(AipBase):
    """
        Aip Speech
    """
    # 中间部分略
    def main(self):
        """入口方法"""
        api_ = AipSpeech(self._app_id, self._api_key, self._secret_key)
        # 我们要合成文本信息保存在 baidu_speech.txt 文件中
        with open("baidu_speech.txt", 'r', encoding="utf-8") as read_f:
            read_content = read_f.read()
        result = api_.synthesis(read_content, 'zh', 1, {'vol': 5, 'per': 3})
        # 识别正确返回二进制数据 错误则返回dict码
        if not isinstance(result, dict):
            # 合成的语音文件名为
            with open('baidu_speech.mp3', 'wb') as f:
                f.write(result)
以上,便完成了整个百度语音合成的 API 封装,关注公众号,后台回复
语音合成 获取完整源码。
4.使用 API 实现语音合成
1、配置 API 参数,在baidu_speech_synthesis.py最下方定义API调用demo。
if __name__ == '__main__':
    app_id = '这里改成你的应用 ID'
    api_key = '这里改成你的API 开发密钥'
    secret_key = '这里改成你密钥'
    AipSpeech(app_id, api_key, secret_key).main()
2、baidu_speech.txt 文件内容如下图(这里使用相见恨晚的歌词测试):

txt文件png.png
3、执行完程序,会在同级目录下生成一个名为baidu_speech.mp3的音频文件,下面我可以使用播放工具播放即可。
5.总结
1、原创文章已全部更新至 Github:https://github.com/kelepython/kelepython
2、本文永久博客地址:https://kelepython.readthedocs.io/zh/latest/c03/c03_02.html
3、整个实现案例比较简单,建议大家亲自尝试一下。
4、封装代码时一定要细心,建议每次封装完一个小块,就执行验证其正确性。
5、案例合成语音使用中音量、情感合成男声,如果感兴趣,可自行调整参数尝试。
6、关注公众号,后台回复
语音合成获取完整源码,有任何疑问欢迎留言交流。